

How To Access The Camera On A Mac
Apple is always working on improving your security and ensuring the programs you install don't abuse your data. For case, all apps are required to get your approving before accessing the camera and microphone on your Mac. Every time you open the application for the outset time, y'all'll demand to give permission to employ your figurer'due south camera.
Below we'll testify you how to requite camera admission to any installed app. Also, you lot'll learn how to limit access to programs you suspect might be recording videos without your cognition. Permit'south dive in!
Securing your camera and microphone
By default, macOS prevents apps from getting your personal information without your permission. That'south why when you open the program that wants to access your hardware, you'll receive a pop-up. To requite access, you just accept to permit it in System Preferences. If this is a reliable app from a legitimate developer, you'll need to practise it once and never call back almost information technology once again.

If yous click "Cancel," y'all could easily alter that later your Mac. You can check what apps are allowed to use your camera and allow or cake admission at any fourth dimension. And here'southward how to practise that.
How to manage your camera permissions
Now let'south run across a few ways that let the apps to admission your camera. If you're looking for a simple automated solution, jump direct to the concluding method.
#1 Utilize Organization Preferences
Follow these steps to give some apps admission to your camera:
- Go to the Apple menu.
- Cull Arrangement Preferences.
- Click Security & Privacy.
- Choose Camera from the lefthand menu.
- Allow the app to access your photographic camera by ticking the box next to it.

If the application is opened on your Mac, yous'll receive a bulletin request you to quit information technology.

Click "Quit Now" and close the Arrangement Preferences window.
#ii Use your web browser
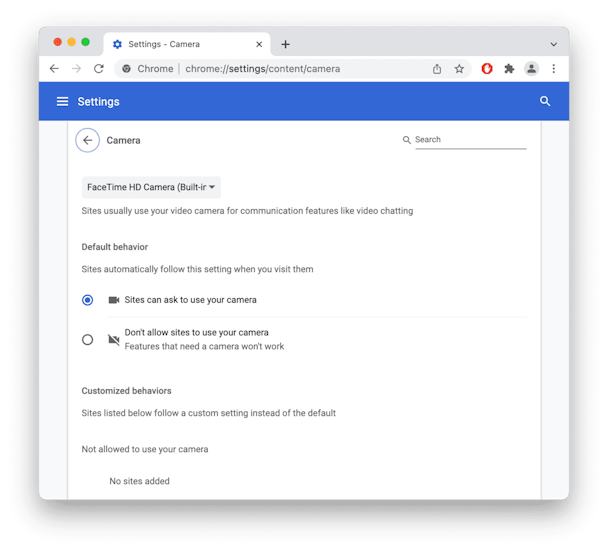
Let's see how to enable camera permissions via Google Chrome.
- Open up Chrome.
- Go to the Chrome menu > Settings.
- Select Privacy and Security.
- Then, click Site Settings.
- Choose Camera.
- Click "Sites tin enquire to use your photographic camera" and adapt the setting to your liking.

The procedure is similar for all web browsers, so if you're using Safari or Firefox, you shouldn't have issues with finding camera permissions settings.
#iii Use Parental Controls
The Screen Fourth dimension feature on Mac also allows you to manage your camera.
- Open Organization Preferences from the Apple menu.
- Blazon Screen Time in a search bar.
- Click Content & Privacy.
- Click on the Apps tab.

If you desire to block camera access, uncheck the box. This volition preclude all the apps on your Mac from using the born cameras.
#4 Utilise the app CleanMyMac Ten
We've come up to the smoothest and the most intuitive fashion of taking care of your app permissions — with the help of an app called CleanMyMac X.
This tool has a lot of useful features, similar cleaning your Mac from junk files, speeding upwardly the organisation, checking your computer for viruses and malware, and much more than. A cool characteristic like "Application Permissions" allows decision-making all your permissions, including your camera, in a few clicks. You should check it out!
- Download CleanMyMac Ten (a free trial version is available).
- Launch the app.
- Go to the Privacy tab and click Scan.
- Cull "Awarding Permissions."
- Check what apps take admission to your photographic camera and make changes.

Once y'all've solved the issue with your permissions, cheque out other CleanMyMac X tools. We recommend yous run a Smart Scan first. It will discover unneeded files, determine potential threats, and define suitable speedup tasks for your Mac.

So feel free to try other tools in the left console —yous'll find a lot of useful tools for making your Mac equally skilful every bit new.
Thanks for reading and stay tuned!
Source: https://macpaw.com/how-to/allow-camera-access-mac
Posted by: mcdonaldyone1997.blogspot.com
0 Response to "How To Access The Camera On A Mac"
Post a Comment